João GabrielOctober 25, 2023
Introduction to Shaders in SwiftUI: Wave Effect
Breaking the ice: learn how to create an efficient and reusable wave effect with a custom Metal shader for SwiftUI views.
Hi! And welcome back. I know – it's been a while.
In this blog post, we'll go over Metal shaders and how you can use them to modify your SwiftUI views. With the changes introduced to SwiftUI in WWDC23, Apple has implemented three new APIs in Xcode 15 and iOS 17 to natively incorporate Metal shaders into SwiftUI views, making it easier than ever for developers and designers to come up with effects that are both stunning and easy on processing power.
To skip the introduction and go straight to the code, click here.
Why shaders?
Shaders aren't something new. They have been around for a while, and they are used in many different areas, from game graphics to image processing and machine learning. Essentially, each shader is a small program that runs on the GPU (the graphics processing unit), and it's responsible for computing the color of each pixel on the screen based on attributes given by the CPU (the core processing unit). Since the GPU is specialized in these kinds of operations, it means that shaders can run much faster than if they were executed on the CPU – and that's called hardware acceleration.
These advantages don't come at no cost though – shaders are hard to write, and they are even harder to debug. But don't worry, we'll keep it simple here, for now.
The structure of Metal code
Metal Shading Language, or MSL, is a C++-based language introduced by Apple so that developers could write shaders for their devices – another shader languages that you might have heard of are GLSL (OpenGL Shading Language). MSL is a low-level language, which means that it's very close to the hardware, and it's not very friendly to write. Here's the general structure of a .metal file:
#include <metal_stdlib>

using namespace metal;

[[ stitchable ]] void name() {
    // shader code that returns no value and has no arguments
}
The code above specifies that we are writing a shader called name, which currently takes no arguments and returns a value. The lines #include <metal_stdlib> and using namespace metal at the top specify that we want to have access to default Metal types and functions.
Adding a Metal shader to your project
In this article, we'll create a displacement shader to create a wave effect on a Text view. But first, create an Xcode project with Xcode 15.0 Beta and iOS 17 as the deployment target. In your ContentView, let's add a text label:
ContentView.swift
import SwiftUI

struct ContentView: View {
    var body: some View {
        Text("shaders")
            .font(.system(size: 48, weight: .bold))
            .kerning(-1.5)
            .padding()
    }
}
It's wise now to look up the documentation on how we reference shaders from SwiftUI. According to the docs, there are three types of shaders modifiers available: colorEffect(), distortionEffect() and layerEffect(). We'll look over all of them, but since we want a wave distortion effect for now, we'll use the second option.
The documentation says that for a shader function to be valid for a distortion effect it must have a function signature matching
[[ stitchable ]] float2 name(float2 position, args...)
where position is float2 value – a vector with two float values – representing the user-space coordinates of the destination pixel applied to the shader. The function should return the user-space coordinates of the corresponding source pixel. Additionally, we can specify extra arguments when calling the shader in our SwiftUI code.
Now, let's create our Metal file. Go to File > New > File, and select Metal File. Name it wave.metal. Let's start by adding our previous sample code, adding a name and returning an empty float2:
wave.metal
#include <metal_stdlib>
using namespace metal;

[[ stitchable ]] float2 wave(float2 position) {
    return float2(0.0);
}
Metal structures have simplified initializers and operators to simplify the code.
For example, in the snippet above we could have written return float2(0.0, 0.0), specifying both elements, or simply float2() since zero is its default state. return float2(0.0) means it will return a vector with 0.0 as the value for both elements of the vector. Since MSL also supports scalar-to-vector conversion, we could have written return 0.0 and it would have worked fine as well.
Those vector types also support direct operations, such as add or multiply. For example, float2(1.0, 2.0) + float2(3.0, 4.0) would yield float2(4.0, 6.0).
Then, let's call our shader with SwiftUI with the .distortionEffect() modifier:
ContentView.swift
import SwiftUI

struct ContentView: View {
    var body: some View {
        Text("shaders")
            .font(.system(size: 48, weight: .bold))
            .kerning(-1.5)
            .distortionEffect(ShaderLibrary.wave(), maxSampleOffset: .init(width: 0, height: 0)) // Add this line
            .padding()
    }
}
As you might now know, Xcode 15.0 now generates static code references to project assets – and that extends to shaders! The ShaderLibrary struct will hold references to named functions in your .metal files, and you can call them directly from your code like we're doing here. The maxSampleOffset argument specifies the maximum offset that the shader can apply to the pixels on the screen.
Now, go ahead and run your app. You should see... well, nothing.
That's because our shader is returning the same position for all pixels. Let's modify our code to, at least, return their original position:
wave.metal
#include <metal_stdlib>
using namespace metal;

[[ stitchable ]] float2 wave(float2 position) {
    return position;
}
Now you can recompile your app and see that the text is back to normal. Let's make sure that our shader is doing something by modifying the position:
wave.metal
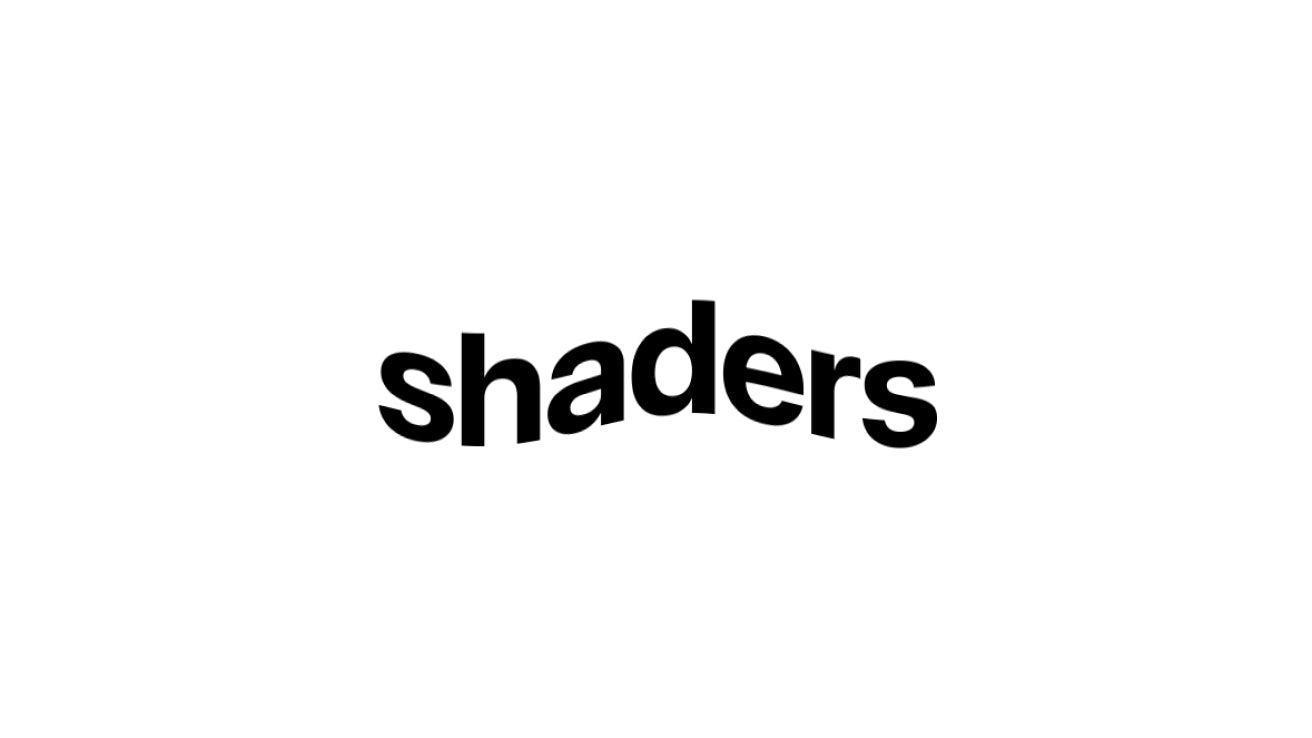
return position-float2(0, position.x*0.1);
This makes the text bend slightly over the x axis. However, it gets cut off at the edges. That's because, for the framwework, the Text view has a limited height and can't be displaced past that. To fix that, we can add a vertical padding of our maximum offset, as well as a drawingGroup() modifier to rasterize the layer. Trust me – it's hacky, but it works.
ContentView.swift
Text("shaders")
    .font(.system(size: 48, weight: .bold))
    .kerning(-1.5)
    .padding(.vertical, 50)
    .drawingGroup()
    .distortionEffect(ShaderLibrary.wave(), maxSampleOffset: .init(width: 0, height: 50))
Great! Now we have skewed text. This is not yet our desired effect – but we're getting close! Since we want to have a wave effect, we can use the simplest possible wave function made available to us from geometry: the sine function! Thankfully, the Metal Standard Library has a built-in sin() function, so we can use that to displace our view.
By the way, if you're curious, you can find the specification for the Metal Shading Language and the Metal Standard Library here. The sin() function is specified on page 160.
The sin() function takes one argument, an angle in radians, and returns the sine value for that value in a range of -1 to 1. In simple terms, a sine value can be understood as the y-axis of a point on the unit circle drawn from the specified angle.
The animation above shows how a wave forms from the sine function of the circle. With that in mind, we can now displace our text using the sin function based on the pixel's x coordinate.
wave.metal
[[ stitchable ]] float2 wave(float2 position) {
    return position-float2(0, sin(position.x));
}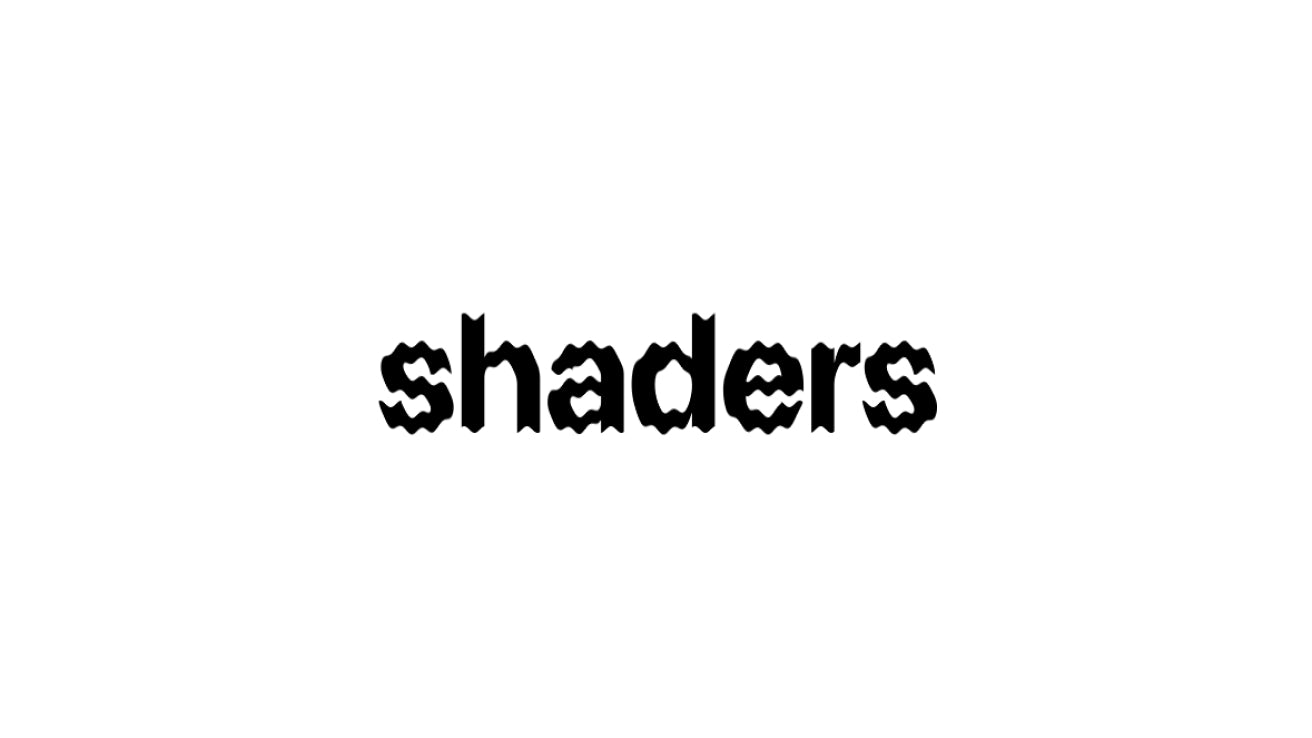
Great! As you might see, the wave effect is working. However, it has a small amplitude and a high frequency, which means that each wave is very small and very close together. To fix that, we can multiply the sine value by a constant to increase the amplitude, and multiply the x position by another constant to change the frequency.
wave.metal
[[ stitchable ]] float2 wave(float2 position) {
    return position-float2(0, sin(position.x*0.05)*5);
}
Alright. That looks good! Now, let's animate it. The simplest way I've found to animate a distortion shader is through SwiftUI's own TimelineView. Let's add a TimelineView to our ContentView:
ContentView.swift
TimelineView(.animation) { context in
    Text("shaders")
        .font(.system(size: 48, weight: .bold))
        .kerning(-1.5)
        .padding(.vertical, 50)
        .drawingGroup()
        .distortionEffect(ShaderLibrary.wave(), maxSampleOffset: .init(width: 0, height: 50))
}
Now, let's add time as a shader argument and add it as a displacement to our sin() function angle:
wave.metal
[[ stitchable ]] float2 wave(float2 position, float time) {
    return position-float2(0, sin(position.x*0.05+time)*5);
}
Finally, let's pass it as an argument to our shader:
ContentView.swift
// Declare as a view attribute
let startDate = Date.now

// And then change your modifier
.distortionEffect(ShaderLibrary.wave(.float(context.date.timeIntervalSince(startDate))), maxSampleOffset: .init(width: 0, height: 50))
Great! You have now successfully created your first animated Metal shader in SwiftUI with custom parameters.
Reusable modifier
If we want to turn this into a reusable modifier, this is how we may do so:
First, let's update our Metal function to accept length and amplitude parameters.
wave.metal
[[ stitchable ]] float2 wave(float2 position, float length, float amplitude, float time) {
    return position-float2(0, sin(time+position.x/length)*amplitude);
}
Then, let's create a new file called View+Wave.swift and add the following code:
View+Wave.swift
fileprivate struct WaveModifier: ViewModifier {
    var length: CGFloat
    var amplitude: CGFloat
    var speed: CGFloat

    let startDate = Date.now

    func body(content: Content) -> some View {
        if speed == 0 {
            effect(content: content, time: 0)
        } else {
            TimelineView(.animation) { context in
                effect(content: content, time: context.date.timeIntervalSince(startDate)*speed)
            }
        }
    }

    func effect(content: Content, time: CGFloat) -> some View {
        content
            .padding(.vertical, amplitude)
            .drawingGroup()
            .distortionEffect(ShaderLibrary.wave(.float(length), .float(amplitude), .float(time)), maxSampleOffset: .init(width: 0, height: amplitude))
    }
}
This modifier encapsulates the logic we've written before, and it also allows us to specify the length, amplitude and speed of the wave. The speed parameter is a multiplier for the time, so if you want to have a wave that moves twice as fast, you can set it to 2. If you want it to move backwards, you can set it to -1. If the speed is 0, it won't create a TimelineView as it's not necessary.
Now, let's make a public extension to View:
View+Wave.swift
extension View {
    func wave(length: CGFloat = 15, amplitude: CGFloat = 5, speed: CGFloat = 1) -> some View {
        modifier(WaveModifier(length: length, amplitude: amplitude, speed: speed))
    }
}
And now, this is how we can use it in our code:
ContentView.swift
struct ContentView: View {
    let startDate = Date.now

    var body: some View {
        Text("shaders")
            .font(.system(size: 48, weight: .bold))
            .kerning(-1.5)
            .wave()
    }
}
João Gabriel
Cindori Developer